A Fast and Private AI-Coding Assistant
Want to run AI LLM locally with GPU without sending your code to the cloud? Here’s how to run your own private AI coding assistant, powered by open-source LLMs, directly on your machine with GPU using Tabby ML.
This recipe is focused for those working on a Windows + WSL environment, but can be used by anyone using Ubuntu as well.
Why Run a Local LLM with GPU?
Running an AI LLM locally with GPU gives you:
-
Performance: Instant completions using your own hardware (no latency)
-
Privacy: No code leaves your machine
-
Flexibility: Choose your favorite open-source model (Qwen, DeepSeek, etc.)
-
Control: Zero dependency on cloud APIs or subscriptions
What You Need
We’re setting up a fully local GPU-powered AI assistant using:
| Tool | Purpose |
|---|---|
| Windows 11 | Host operating system |
| WSL2 + Ubuntu 24.04 | Dev environment inside Windows |
| NVIDIA RTX A6000 | 48GB VRAM for model inference (!!) |
| Tabby ML v0.27.0 | Open-source coding assistant |
| CUDA 12.8 | GPU acceleration backend |
| DeepSeekCoder 6.7B or Qwen 2.5 Coder 7B (or any other model supported by Tabby) | LLM model |
Step-by-Step: Running Your Private Tabby Instance locally
First of all, if you don’t know Tabby you should read the docs. It has more than 30k starts on GitHub. I won’t show you here hoy tu use it on your IDE, no, here you’ll learn how to run it on your development environment or network.
1. Download Tabby (CUDA Build)
I will use CUDA 12 build, you could also try it with a CPU only build, but that will limit your capabilities for obvious reasons.
mkdir -p $HOME/tabby/v0.27.0
cd $HOME/tabby/v0.27.0
wget https://github.com/TabbyML/tabby/releases/download/v0.27.0/tabby_x86_64-manylinux_2_28-cuda123.tar.gz
tar -xzvf tabby_x86_64-manylinux_2_28-cuda123.tar.gz --strip-components=1

rm tabby_x86_64-manylinux_2_28-cuda123.tar.gz
This gives you a CUDA-accelerated build of Tabby and llama-server.
2. Create a System-Wide tabby Command
Yep, I am a lazy guy, I preffer to spend few more minutes creating a script to automate that finally works for me, and this might also work for you.
sudo nano /usr/local/bin/tabby#!/bin/bash
CUDA_VISIBLE_DEVICES=0 $HOME/tabby/v0.27.0/tabby serve \
--model TabbyML/DeepSeekCoder-6.7B \
--chat-model Qwen2.5-Coder-7B-Instruct \
--host 0.0.0.0 \
--port 7466 \
--device cuda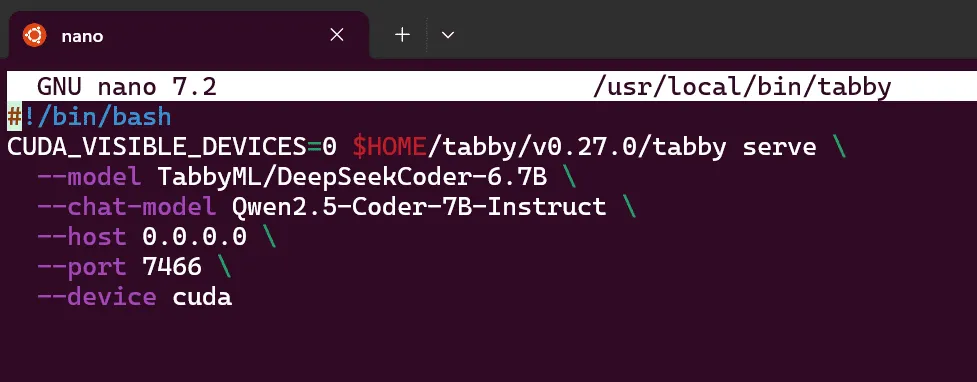
Then, let’s provide execution permisions:
sudo chmod +x /usr/local/bin/tabbyAn now you can launch your LLM with a simple:
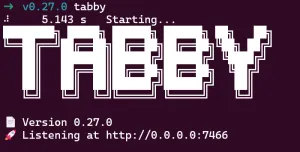
tabby3. Access It from Both Ubuntu and Windows
Edit your Ubuntu and Windows hosts file:
127.0.0.1 tabbyNow you can access your AI at:
http://tabby:74664. Auto-start Tabby at Boot with systemd
TBH: I couldn’t make this work properly and I finally decided to launch it manually. I will keep this as a non-fully-working recipe. If you make it work, please, let us know in the comments.
I told you I am a lazy guy… And I don’t even want to write tabby. It is my assistant and I want it to be ready at boot time, so, let’s create and enable this service:
sudo nano /etc/systemd/system/tabby.service[Unit]
Description=Tabby ML
After=default.target
[Service]
User=juan
ExecStartPre=/bin/sleep 10
ExecStart=/usr/local/bin/tabby
Restart=always
RestartSec=10
[Install]
WantedBy=default.targetTo enable the service just execute:
sudo systemctl daemon-reload
sudo systemctl enable --now tabby.service
Tabby will now start automatically after reboot — your local LLM is always on.
NOTE: after rebooting my system it didn’t work, it seems systemd doesn’t start by default unless explicitly enabled in your distro. To fix this:
sudo nano /etc/wsl.conf- Add:
[boot]
systemd=true- Exit and shutdown WSL completely:
wsl --shutdown- Launch Ubuntu again:
wslNow systemd will run automatically, and your tabby.service should work on boot.
You can confirm with:
systemctl status tabby.serviceFinal Result: Local AI LLM with GPU, Ready for Dev
You now have:
-
A self-hosted AI LLM running on our local GPU
-
Full privacy — no code sent to external servers
-
Fast completions using DeepSeekCoder or Qwen (or the model of your choice)
-
Seamless access from Ubuntu and Windows
-
Full control over the backend and environment
Why This Matters
As technical leaders, our priorities are clear: speed, privacy, and control. Running a self-hosted AI with GPU acceleration gives our teams exactly that, and Tabby ML makes it practical.
There are impressive coding copilots out there, but I simply can’t justify sending our clients’ intellectual property to third-party servers with unclear data handling practices. Every keystroke matters. Privacy isn’t optional, it’s our responsibility.
With Tabby, there’s no cloud, no lock-in, just a powerful, private AI that runs on our own infrastructure, exactly how it should be.
If you set up Tabby using this approach, I’d love to hear how it’s working for you.

⚠️ [Update – April 3, 2025]
1. Katana Required for Context Providers
If you want Tabby to import and reason over documentation, you’ll need to install Katana, which is used by Tabby as a crawling backend for context providers.
Install it with:
curl -L https://github.com/projectdiscovery/katana/releases/download/v1.1.2/katana_1.1.2_linux_amd64.zip -o katana.zip
unzip katana.zip katana
sudo mv katana /usr/bin/
rm katana.zip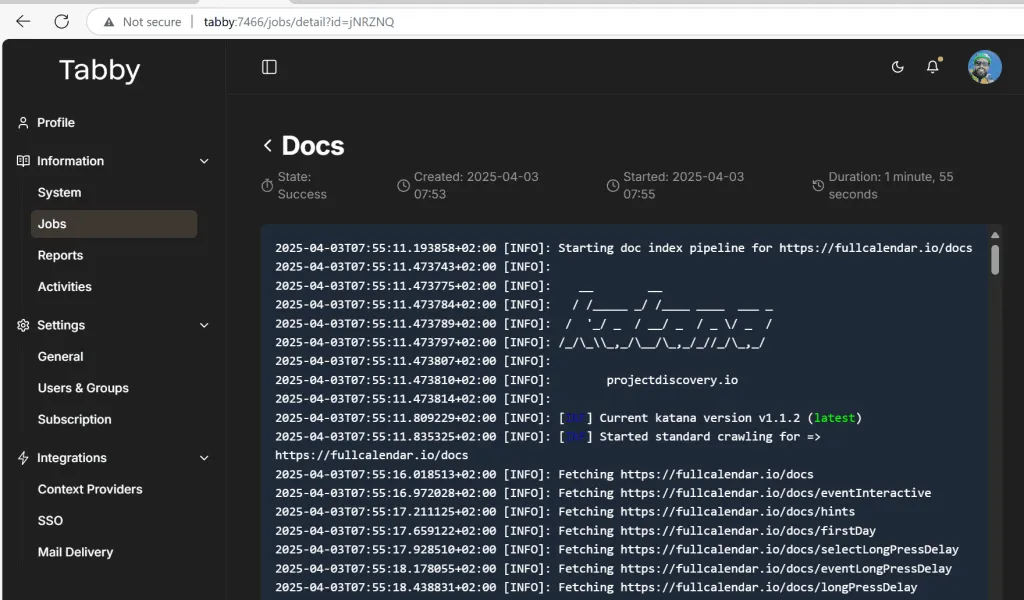
2. GPU Index Inversion Gotcha
⚠️ Important: Your CUDA_VISIBLE_DEVICES index may not match the physical GPU labels shown in nvidia-smi.
In my case:
-
CUDA_VISIBLE_DEVICES=0actually mapped to GPU 1 (RTX A6000) -
CUDA_VISIBLE_DEVICES=1ended up using GPU 0 (T1000)
To be safe, test manually with:
CUDA_VISIBLE_DEVICES=0 python3 -c "import torch; print(torch.cuda.get_device_name(0))"Make sure it’s pointing to your fastest GPU before launching Tabby.
Now I can say that I’m starting to squeeze all the power out of Tabby at super speed.